Introduction
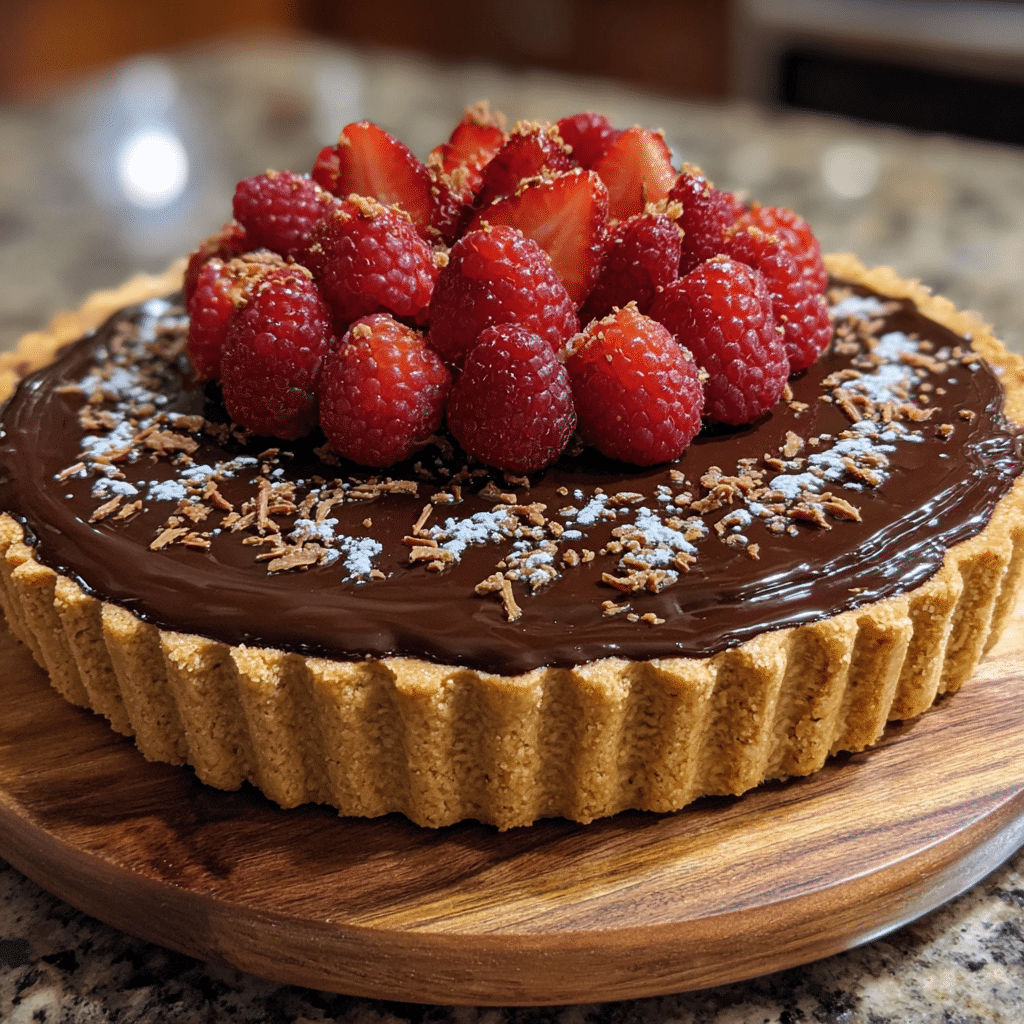
No-Bake Chocolate Biscoff Tart is a rich, elegant dessert that delivers maximum indulgence with minimal effort. This recipe is ideal when you want a show-stopping sweet without turning on the oven. A buttery biscuit base supports a silky chocolate filling, finished with a glossy layer of smooth Biscoff spread that sets beautifully in the refrigerator. What makes this tart special is the balance of flavors: deep chocolate richness paired with the warm, caramelized spice notes of Biscoff. I tested this recipe for a summer gathering and appreciated how well it held its shape while still slicing cleanly. The no-bake method makes it accessible even for beginners, yet the final result looks bakery-worthy. Whether you are preparing a dessert for guests or simply treating yourself, this tart offers a luxurious experience using simple ingredients and straightforward steps.
Print
No-Bake Chocolate Biscoff Tart That Looks Impressive With Zero Oven Time
- Total Time: 4 hours 30 minutes
- Yield: 8 slices
- Diet: Vegetarian
Description
No-Bake Chocolate Biscoff Tart is a rich and indulgent dessert made with a crunchy Biscoff biscuit crust and a smooth, creamy chocolate filling—no oven required.
Ingredients
- 250 g Biscoff biscuits
- 100 g unsalted butter, melted
- 200 g dark chocolate, chopped
- 1 cup heavy cream
- 1/2 cup Biscoff spread
- 1 teaspoon vanilla extract
- Pinch of salt
- Biscoff spread or crushed biscuits for topping (optional)
Instructions
- Crush the Biscoff biscuits into fine crumbs using a food processor.
- Mix biscuit crumbs with melted butter until well combined.
- Press the mixture firmly into the base and sides of a tart pan. Chill for 20 minutes.
- Heat heavy cream in a saucepan until just beginning to simmer.
- Pour hot cream over chopped dark chocolate and let sit for 2 minutes.
- Stir until smooth, then mix in Biscoff spread, vanilla extract, and salt.
- Pour the chocolate mixture into the chilled crust and smooth the top.
- Refrigerate for at least 4 hours or until fully set.
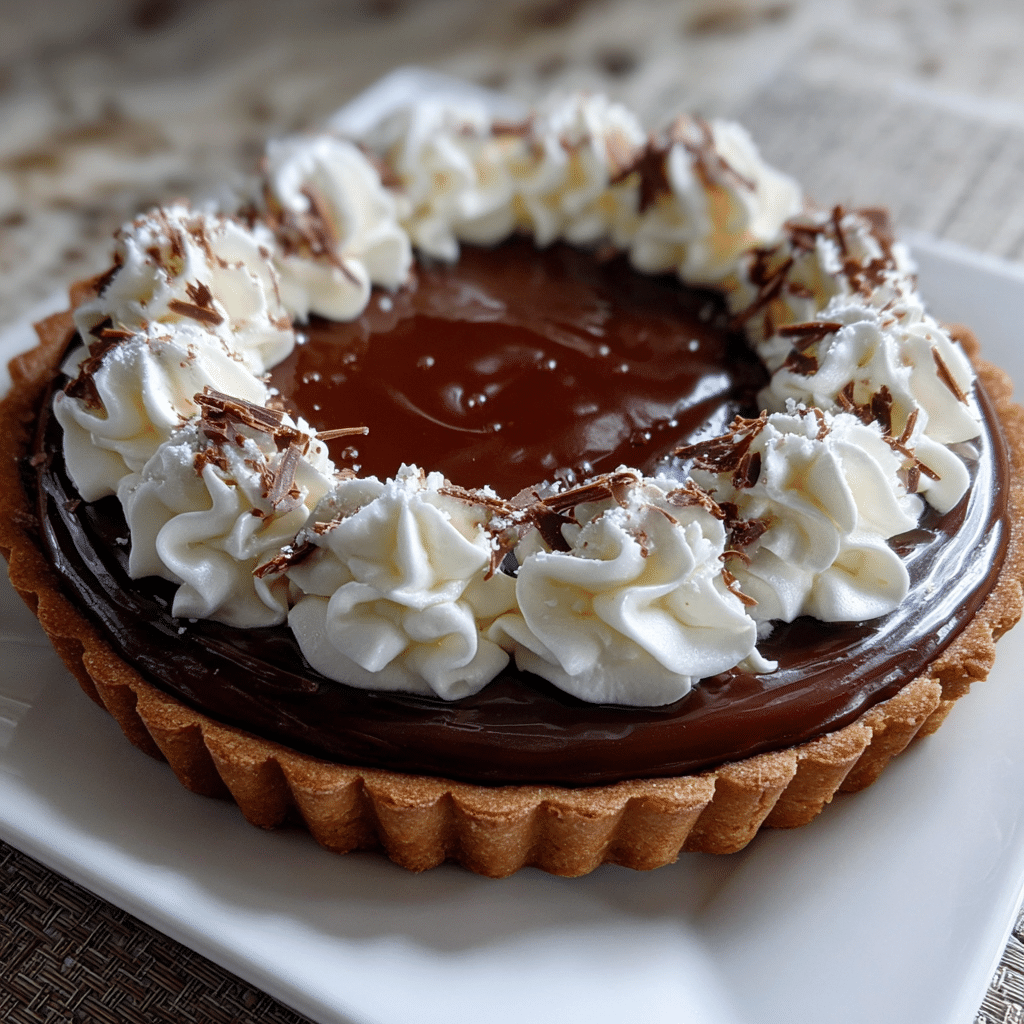
- Garnish with melted Biscoff spread or crushed biscuits before serving.
Notes
- Use good-quality chocolate for best flavor.
- Chill overnight for a firmer texture.
- Serve slightly chilled for clean slices.
- Prep Time: 20 minutes
- Cook Time: 10 minutes
- Category: Dessert
- Method: No-Bake
- Cuisine: International
Why You’ll Love This Recipe
This dessert is easy, oven-free, and incredibly rich in flavor. It can be made ahead, slices neatly, and appeals to both chocolate and Biscoff lovers alike. It is perfect for entertaining or special occasions.
Ingredients
(Tip: You can find the complete list of ingredients and their measurements in the recipe card below.)
Chocolate digestive biscuits form the base of the tart. When crushed and combined with butter, they create a firm, flavorful crust.
Unsalted butter binds the biscuit crumbs together and adds richness to the base.
Dark chocolate provides depth and structure to the filling. It balances the sweetness of the Biscoff topping.
Heavy cream creates a smooth, luxurious ganache filling when combined with melted chocolate.
Powdered sugar lightly sweetens the filling without making it heavy.
Biscoff spread is the star topping of the tart. Its creamy texture and spiced caramel flavor elevate the dessert.
Vanilla extract enhances the chocolate flavor and adds warmth.
Salt sharpens the sweetness and balances the richness of the filling.
Directions
Begin by crushing the biscuits into fine crumbs and mixing them with melted butter until evenly coated. Press the mixture firmly into the base and sides of a tart tin and refrigerate until set. For the filling, heat the cream gently until just steaming, then pour it over the chopped chocolate. Let it sit briefly before stirring until smooth. Add powdered sugar, vanilla extract, and salt, mixing until fully incorporated. Pour the chocolate filling into the chilled crust and smooth the surface. Refrigerate until firm. Warm the Biscoff spread slightly until pourable, then spread it evenly over the set chocolate layer. Chill again until fully set before slicing and serving.
Equipment needed :
Must-Have Tools to Get Rolling
Here’s what you’ll want to have on hand:
Silicone Spatula – Durable, heat-resistant silicone spatula perfect for mixing, scraping, and spreading. Gentle on non-stick cookware and easy to clean.
Large pot – You’ll need this to boil the whole cabbage head and soften the leaves.
large bowl –Spacious, durable large bowl ideal for mixing, serving, or food preparation. Made from sturdy material and easy to clean.
Sharp knife – For coring the cabbage and slicing out the thick stem in each leaf. A paring knife works best.
Mixing bowl – A big bowl makes it easier to combine your meat and rice filling evenly.
Cutting board – For prepping cabbage leaves and rolling them like a pro.
Full-Size Blender – is a powerful kitchen appliance for making smoothies, soups, and sauces in large batches.
3-in-1 Air Fryer – This versatile 3-in-1 air fryer offers Air Fry for healthier meals with less oil, Bake for bakery-quality desserts and treats, and Reheat to bring leftovers back to life with crispy, flavorful results
Servings and timing
This tart serves ten people comfortably. Preparation takes about 25 minutes, with a chilling time of at least four hours for best results.
Storage/reheating
Store the tart covered in the refrigerator for up to four days. This dessert does not require reheating and should be served chilled or slightly softened at room temperature.
Variations and Customizations
No-Bake Chocolate Biscoff Tart adapts beautifully to different preferences. Milk chocolate can replace dark chocolate for a sweeter filling, though the tart will be softer. A layer of crushed Biscoff biscuits can be sprinkled between the chocolate and Biscoff topping for added texture. I have also tested a version with a thin layer of whipped cream on top, which lightens the richness and adds visual appeal. For a more intense flavor, a small amount of espresso powder can be added to the chocolate filling. Gluten-free biscuits work well for the base, making this dessert suitable for more dietary needs without sacrificing structure or flavor.
Nutrition and Dietary Info
This dessert is rich and indulgent, best enjoyed in moderate portions. While high in calories and fats, small slices are satisfying. Using dark chocolate with higher cocoa content can slightly reduce overall sweetness.
Expert Tips & Customizations
Firm base
Press the crust firmly to ensure clean slices.
Smooth topping
Warm the Biscoff gently to avoid tearing the chocolate layer.
Chill time
Allow adequate chilling for the best texture and presentation.
FAQs
Can I make this tart ahead of time?
Yes, it is ideal for preparing one day in advance.
Does this dessert need baking at all?
No, the entire recipe is completely no-bake.
Can I freeze the tart?
Freezing is possible, but texture may change slightly when thawed.
What tin size works best?
A standard 9-inch tart tin is ideal.
Can I reduce the sweetness?
Use darker chocolate and reduce powdered sugar slightly.
Is this dessert very firm?
It slices cleanly but remains soft and creamy.
Can I use crunchy Biscoff spread?
Yes, it adds texture to the topping.
What can I serve with this tart?
Fresh berries pair well with the richness.
Is this suitable for parties?
Yes, it is visually appealing and easy to portion.
Can I make it dairy-free?
Use dairy-free butter, cream, and chocolate alternatives.
Conclusion
No-Bake Chocolate Biscoff Tart is a sophisticated dessert that proves impressive results do not require complicated methods. With its layered textures, rich flavors, and make-ahead convenience, it is a reliable choice for any occasion where you want dessert to truly shine.
Hungry for more? Visit our website for full recipes and follow us on Pinterest for daily foodie inspo you’ll love to pin!