Why You’ll Love This Recipe
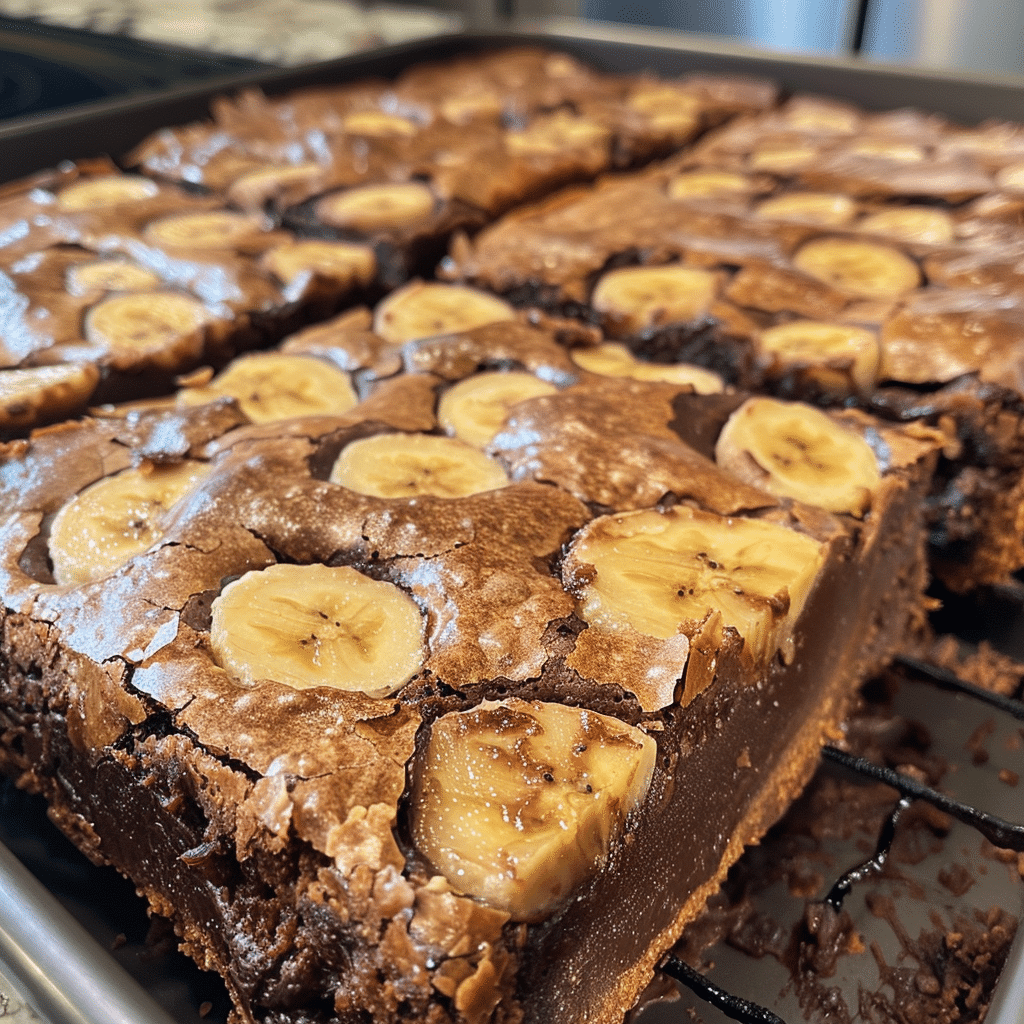
These bars are the best of both worlds: the homey flavor of banana bread meets the texture of a brownie. They’re moist but not overly dense, rich without being too sweet, and full of layers of flavor from banana, chocolate, and vanilla. The batter comes together in minutes, using simple pantry ingredients, and bakes into a beautifully golden, fragrant tray of comfort. Whether you serve them plain, dusted with powdered sugar, or topped with a chocolate drizzle, they’re an instant hit.
Print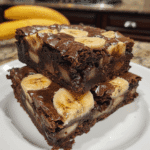
Banana Bread Brownie Bars – The Perfect Fusion of Moist Banana Bread and Fudgy Brownies
Ingredients
Ingredients
(Tip: You can find the complete list of ingredients and their measurements in the recipe card below.)
Ripe Bananas: The foundation of flavor — the riper, the sweeter and more aromatic.
Unsalted Butter: Adds richness and creates a tender, moist crumb.
Brown Sugar: Deepens the flavor with subtle caramel notes.
Granulated Sugar: Balances the sweetness and helps create a soft texture.
Eggs: Provide structure and keep the bars moist and chewy.
Vanilla Extract: Enhances both the banana and chocolate flavors.
All-Purpose Flour: Gives the bars structure without making them heavy.
Baking Powder: Helps the bars rise slightly while keeping them dense and brownie-like.
Salt: Balances sweetness and enhances overall flavor.
Cocoa Powder: Provides that deep, chocolatey contrast to the banana layer.
Chocolate Chips (optional): For extra gooey richness throughout.
Chopped Walnuts or Pecans (optional): Add crunch and a nutty flavor that pairs beautifully with banana and chocolate.
Directions
Preheat your oven to 350°F (175°C). Line a 9×9-inch baking pan with parchment paper and lightly grease it.
In a large bowl, mash the ripe bananas until smooth. Add melted butter, brown sugar, granulated sugar, eggs, and vanilla extract. Whisk until well combined.
In a separate bowl, whisk together flour, baking powder, and salt. Gradually fold the dry ingredients into the wet mixture until just combined — do not overmix.
Divide the batter in half. To one half, add cocoa powder and mix until fully incorporated.
Spread half of the banana batter (without cocoa) into the prepared pan. Spoon the chocolate batter on top in dollops, then add the remaining banana batter. Use a knife or skewer to gently swirl the layers together for a marbled effect.
Sprinkle chocolate chips or nuts on top if desired.
Bake for 25–30 minutes, or until a toothpick inserted in the center comes out with a few moist crumbs. Cool completely in the pan before slicing into bars.
Essential Equipment
Must-Have Tools to Get Rolling
Here’s what you’ll want to have on hand:
Silicone Spatula – Durable, heat-resistant silicone spatula perfect for mixing, scraping, and spreading. Gentle on non-stick cookware and easy to clean.
Large pot – You’ll need this to boil the whole cabbage head and soften the leaves.
large bowl –Spacious, durable large bowl ideal for mixing, serving, or food preparation. Made from sturdy material and easy to clean.
Sharp knife – For coring the cabbage and slicing out the thick stem in each leaf. A paring knife works best.
Mixing bowl – A big bowl makes it easier to combine your meat and rice filling evenly.
Cutting board – For prepping cabbage leaves and rolling them like a pro.
9×13-inch baking dish – Ideal size to fit your rolled cabbage leaves snugly and prevent them from unraveling.
knife – A sharp, durable kitchen knife perfect for slicing, chopping, and dicing with ease.
Servings and timing
This recipe makes about 12 bars. Prep time is 15 minutes, bake time is 30 minutes, and cooling time is 20 minutes, for a total of 1 hour 5 minutes.
Storage/reheating
Store the bars in an airtight container at room temperature for up to 3 days, or refrigerate for up to 5 days. For a warm, gooey texture, reheat individual bars in the microwave for 10–15 seconds. You can also freeze them for up to 2 months — thaw at room temperature before serving.
Variations and Customizations
Peanut Butter Banana Bars
Swirl in a few spoonfuls of peanut butter before baking for a classic flavor combination.
Double Chocolate Banana Brownies
Add chocolate chips to both batters for extra chocolate indulgence.
Cream Cheese Swirl
Drop spoonfuls of sweetened cream cheese on top and swirl before baking for a cheesecake-like twist.
Espresso Chocolate Bars
Add a teaspoon of espresso powder to the chocolate layer for depth and richness.
Gluten-Free Version
Use a 1:1 gluten-free flour blend — they’ll still bake up perfectly moist.
Frosted Banana Brownie Bars
Top cooled bars with a simple chocolate ganache or cream cheese frosting for a decadent finish.
FAQs
1. Can I use frozen bananas?
Yes — thaw and drain any excess liquid before mashing.
2. Can I skip the cocoa layer?
Of course — you’ll end up with a moist banana blondie instead.
3. Can I use oil instead of butter?
Yes, use an equal amount of vegetable or coconut oil for a dairy-free version.
4. Can I make this recipe vegan?
Use flax eggs and plant-based butter or oil — they’ll still turn out soft and rich.
5. Can I reduce the sugar?
Yes, reduce by up to ¼ cup without affecting texture.
6. What kind of chocolate works best?
Unsweetened cocoa powder gives the best contrast, but Dutch-processed cocoa adds a smoother flavor.
7. Can I add nuts or other mix-ins?
Absolutely — nuts, coconut flakes, or even white chocolate chips work beautifully.
8. How do I keep them moist?
Don’t overbake — remove them when a toothpick comes out with a few crumbs.
9. Can I make them in a larger pan?
Yes, but baking time will be shorter, around 20–25 minutes.
10. What’s the best way to serve them?
Serve warm with a scoop of vanilla ice cream or a drizzle of caramel sauce for pure indulgence.
Conclusion
Banana Bread Brownie Bars are the ultimate hybrid treat — moist, chocolatey, and packed with comforting banana flavor. They strike that perfect balance between rich and light, homey and decadent. Whether enjoyed warm from the oven or chilled for a fudgy bite, these bars are guaranteed to satisfy every sweet craving. Easy to make and impossible to resist, they’re the dessert you didn’t know you needed — until now.
Hungry for more? Visit our website for full recipes and follow us on Pinterest for daily foodie inspo you’ll love to pin!