Why You’ll Love This Recipe
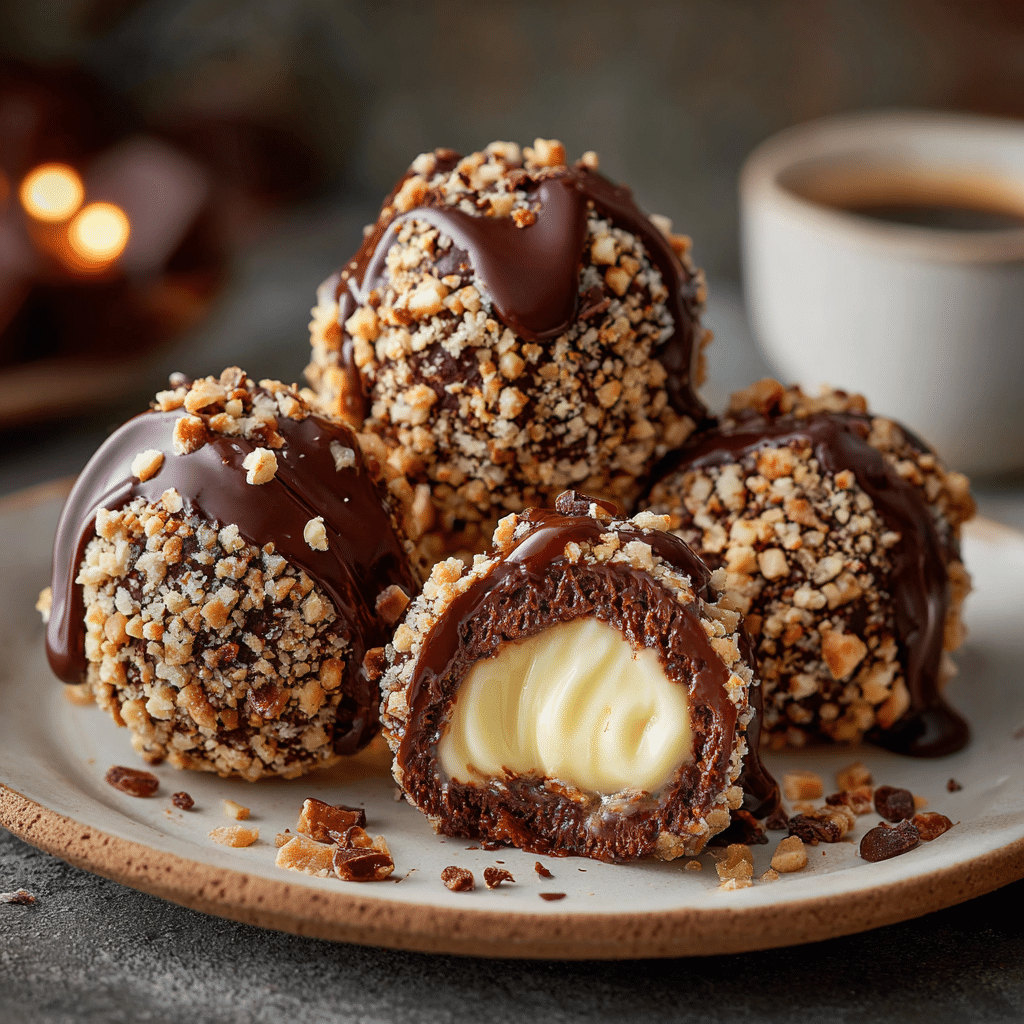
Chocolate Crunch Balls with Cream Filling are the kind of dessert that feels indulgent yet surprisingly easy to prepare. They combine a crisp chocolate shell with a smooth, creamy center, creating a satisfying contrast of textures in every bite. This is one of those recipes I often turn to when I want something impressive without turning on the oven. The crunch comes from simple pantry ingredients, while the cream filling adds a rich, melt-in-your-mouth element that elevates these treats beyond ordinary chocolate balls. When I first made them, I was struck by how quickly they disappeared from the serving plate. They are perfect for parties, holiday platters, or as a make-ahead dessert to keep in the refrigerator for sweet cravings. Elegant, simple, and crowd-pleasing, this recipe is always a success.
Print
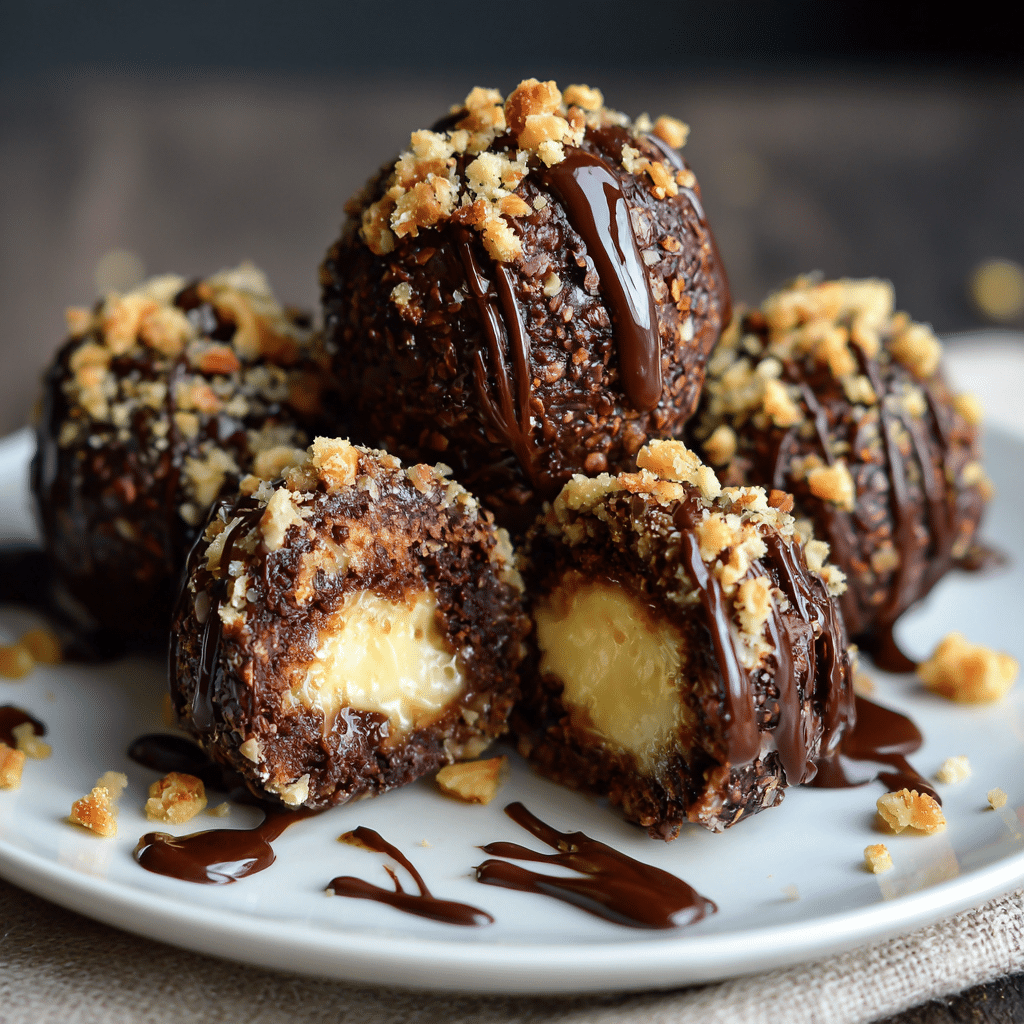
Chocolate Crunch Balls with Cream Filling – An Irresistible No-Bake Treat
- Total Time: 1 hour 25 minutes
- Yield: 20 balls
- Diet: Vegetarian
Description
No-bake chocolate crunch balls filled with a smooth, creamy center, combining rich chocolate flavor with a satisfying crunch for an irresistible bite-sized treat.
Ingredients
- 2 cups crushed chocolate cookies or chocolate cereal
- 1 cup chocolate wafer crumbs
- 1/2 cup melted dark chocolate
- 1/4 cup unsalted butter, melted
- 1/2 cup heavy cream
- 4 oz cream cheese, softened
- 1/3 cup powdered sugar
- 1 tsp vanilla extract
- 1/2 cup chocolate sprinkles or crushed nuts (for coating)
Instructions
- In a bowl, mix crushed cookies or cereal with chocolate wafer crumbs.
- Add melted chocolate and melted butter; stir until well combined.
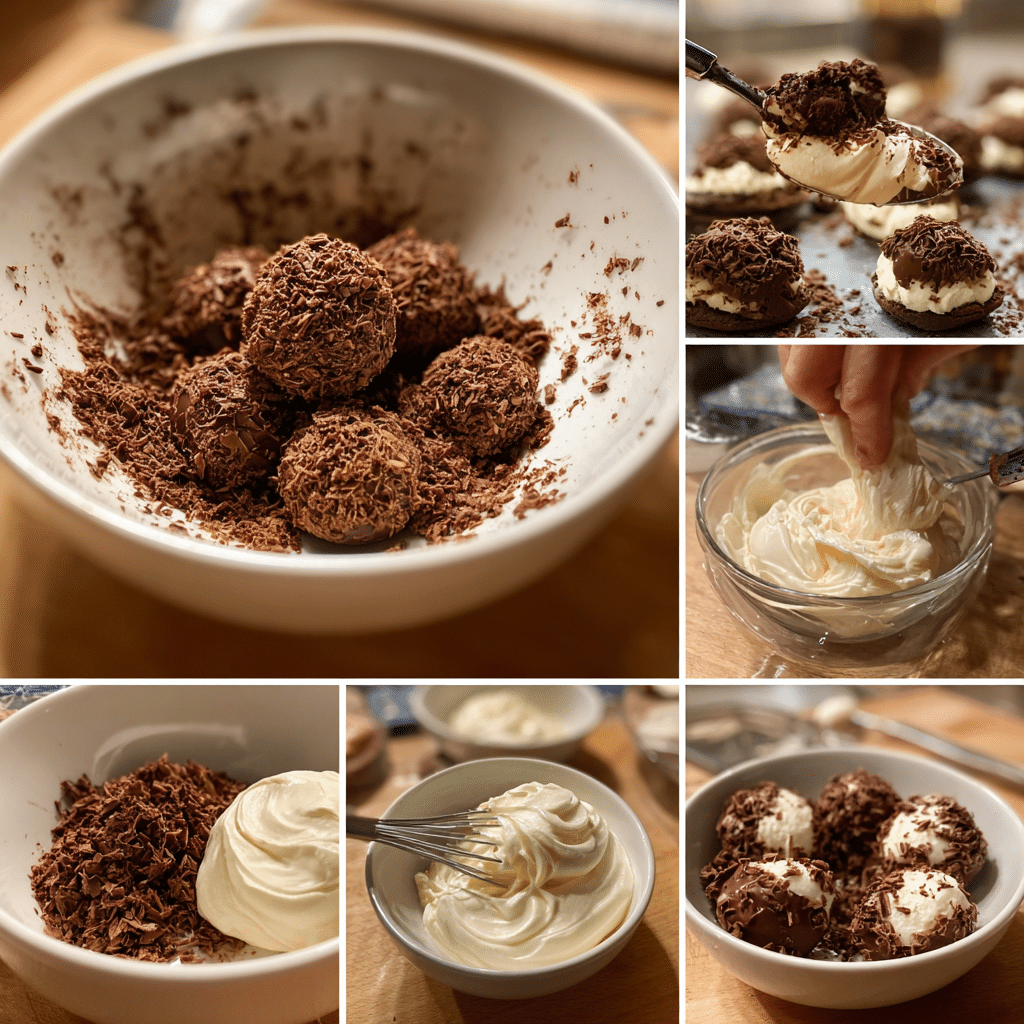
- In another bowl, beat cream cheese, powdered sugar, vanilla extract, and heavy cream until smooth and creamy.
- Scoop small portions of the chocolate mixture and flatten slightly in your palm.
- Add a small spoonful of cream filling to the center.
- Carefully wrap chocolate mixture around the filling and roll into a ball.
- Roll each ball in chocolate sprinkles or crushed nuts to coat.
- Refrigerate for at least 1 hour until firm.
- Serve chilled or slightly softened.
Notes
- Keep hands slightly damp to prevent sticking while shaping.
- Store refrigerated for best texture.
- You can freeze the cream filling briefly to make shaping easier.
- Prep Time: 25 minutes
- Cook Time: 0 minutes
- Category: Dessert
- Method: No-Bake
- Cuisine: International
Ingredients
(Tip: You can find the complete list of ingredients and their measurements in the recipe card below.)
Chocolate biscuits or chocolate cookies
These form the crunchy base of the outer layer, providing structure and deep chocolate flavor.
Cocoa powder
Cocoa intensifies the chocolate taste and enhances richness without extra sweetness.
Butter
Butter binds the crumb mixture together and adds a smooth, rich mouthfeel.
Powdered sugar
Powdered sugar sweetens both the crunch layer and the cream filling while keeping the texture soft.
Milk
Milk helps bring the chocolate mixture together into a workable dough.
Heavy cream
Heavy cream is used for the filling, creating a silky, luxurious center.
Cream cheese
Cream cheese adds body and slight tang to the filling, balancing the sweetness.
Vanilla extract
Vanilla rounds out the flavors and enhances the overall dessert profile.
Chocolate sprinkles or crushed cereal
These add extra crunch and visual appeal to the outer coating.
Directions
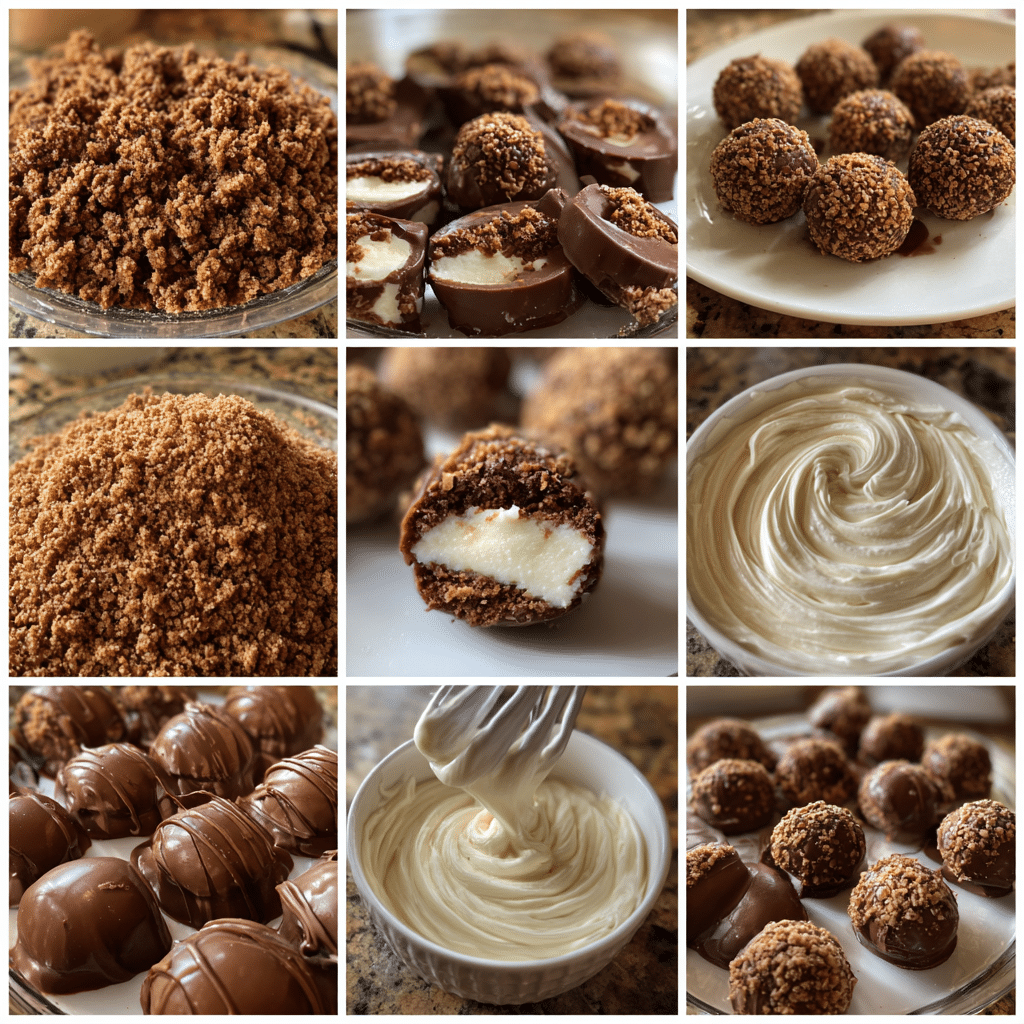
Begin by crushing the chocolate biscuits into fine crumbs using a food processor or rolling pin. Transfer the crumbs to a bowl and mix with cocoa powder and powdered sugar. Add melted butter and milk, stirring until a soft, cohesive dough forms. Cover and refrigerate the mixture for 20 minutes to firm up slightly.
While the outer mixture chills, prepare the cream filling by beating the cream cheese, powdered sugar, heavy cream, and vanilla extract until smooth and thick. Refrigerate the filling briefly to make it easier to handle.
Take a small amount of the chocolate mixture and flatten it in your palm. Spoon a small amount of cream filling into the center, then carefully wrap the chocolate mixture around it, sealing completely. Roll gently into a smooth ball. Roll each ball in chocolate sprinkles or crushed cereal until evenly coated. Refrigerate for at least 30 minutes before serving.
Equipment needed :
Must-Have Tools to Get Rolling
Here’s what you’ll want to have on hand:
Silicone Spatula – Durable, heat-resistant silicone spatula perfect for mixing, scraping, and spreading. Gentle on non-stick cookware and easy to clean.
Large pot – You’ll need this to boil the whole cabbage head and soften the leaves.
large bowl –Spacious, durable large bowl ideal for mixing, serving, or food preparation. Made from sturdy material and easy to clean.
Sharp knife – For coring the cabbage and slicing out the thick stem in each leaf. A paring knife works best.
Mixing bowl – A big bowl makes it easier to combine your meat and rice filling evenly.
Cutting board – For prepping cabbage leaves and rolling them like a pro.
Full-Size Blender – is a powerful kitchen appliance for making smoothies, soups, and sauces in large batches.
3-in-1 Air Fryer – This versatile 3-in-1 air fryer offers Air Fry for healthier meals with less oil, Bake for bakery-quality desserts and treats, and Reheat to bring leftovers back to life with crispy, flavorful results.
Servings and timing
This recipe yields approximately 16 chocolate crunch balls. Preparation takes about 25 minutes, with an additional 30 minutes of chilling time. Total time is around 55 minutes.
Storage/reheating
Store the chocolate crunch balls in an airtight container in the refrigerator for up to 4 days. These treats are best served chilled. Reheating is not recommended, as it may soften the filling too much.
Variations and Customizations
This recipe is easy to customize based on preference. You can add shredded coconut or finely chopped nuts to the outer chocolate mixture for extra texture. For a richer filling, substitute mascarpone for cream cheese.
If you prefer a stronger chocolate flavor, dip the finished balls in melted dark chocolate and allow them to set before serving. You can also flavor the cream filling with espresso powder, orange zest, or a touch of peppermint extract for seasonal variations.
For a lighter version, reduce the amount of butter slightly and use whipped cream cheese. These adjustments allow flexibility while preserving the essential contrast of crunch and cream.
Nutrition and Dietary Info
| Nutrient | Per Serving |
|---|---|
| Calories | 210 kcal |
| Protein | 3 g |
| Carbs | 24 g |
| Fat | 12 g |
| Saturated Fat | 7 g |
| Fiber | 2 g |
| Sugar | 16 g |
| Sodium | 120 mg |
Expert Tips & Customizations
Chill before shaping
Cold dough is easier to handle and seals better around the filling.
Use small amounts of filling
Overfilling can cause the balls to break open.
Roll gently
Light pressure keeps the surface smooth and intact.
Serve chilled
This maintains the crisp exterior and creamy center.
FAQs
Can I make these ahead of time?
Yes, they can be prepared a day in advance and stored in the refrigerator.
Can I freeze chocolate crunch balls?
Yes, freeze them in a sealed container for up to one month.
Are these no-bake?
Yes, this recipe requires no baking at all.
Can I use store-bought cream filling?
Homemade filling is recommended, but store-bought can work in a pinch.
What coating works best?
Chocolate sprinkles, crushed cereal, or cocoa powder all work well.
Can I make them gluten-free?
Yes, use gluten-free chocolate biscuits.
Conclusion
Chocolate Crunch Balls with Cream Filling are a simple yet elegant dessert that combines crisp chocolate flavor with a smooth, creamy surprise inside. Easy to prepare and perfect for sharing, they are a dependable recipe for any occasion where you want a sweet treat without baking.
Hungry for more? Visit our website for full recipes and follow us on Pinterest for daily foodie inspo you’ll love to pin!