Why You’ll Love This Recipe
Tiramisu and brownies are both beloved classics, and when combined, they create a dessert that is nothing short of spectacular. Easy Tiramisu Brownies bring together the fudgy richness of brownies with the creamy, coffee-infused layers of tiramisu. It’s the kind of treat that looks and tastes elegant but is surprisingly simple to make at home. These brownies are perfect for dinner parties, holidays, or just when you’re craving something indulgent. What I love most is that they can be made ahead of time and actually taste even better the next day as the flavors meld together. They offer a perfect balance of chocolatey depth and creamy lightness—every bite feels like a little celebration.
Print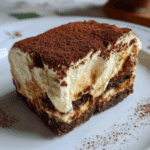
Easy Tiramisu Brownies – A Decadent Fusion Dessert
- Total Time: 2 hrs 50 mins (including chilling time)
- Yield: 16 brownies
- Diet: Vegetarian
Description
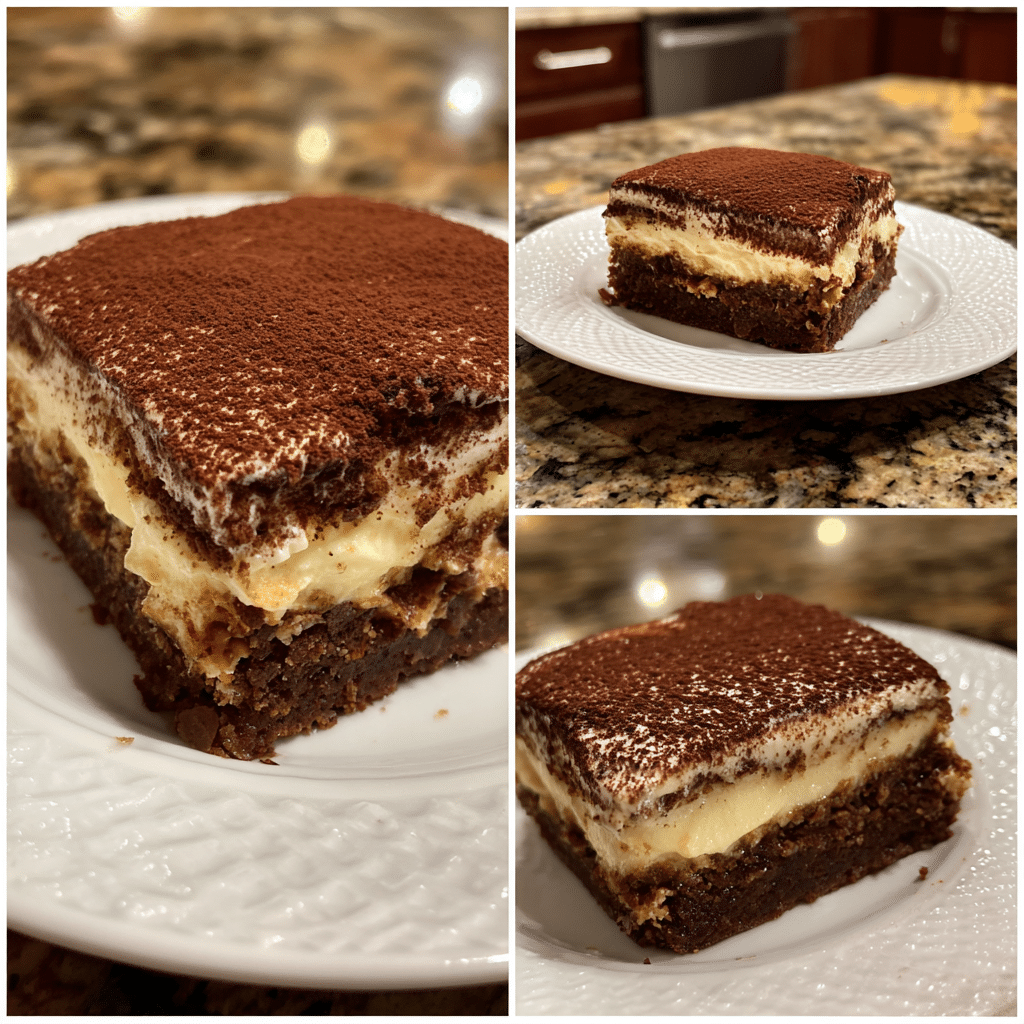
A decadent fusion of two classic desserts – fudgy brownies layered with creamy mascarpone filling and dusted with cocoa powder for a tiramisu-inspired treat.
Ingredients
- 1 box brownie mix (plus ingredients listed on package)
- 8 oz mascarpone cheese, softened
- 8 oz cream cheese, softened
- 1/2 cup powdered sugar
- 1 tsp vanilla extract
- 1 tbsp instant coffee granules dissolved in 2 tbsp hot water
- 1 cup heavy whipping cream
- 2 tbsp cocoa powder (for dusting)
Instructions
- Prepare brownie batter according to package instructions. Bake in a 9×13-inch pan as directed and let cool completely.
- In a bowl, beat mascarpone, cream cheese, powdered sugar, vanilla, and dissolved coffee until smooth.
- In another bowl, whip heavy cream until stiff peaks form. Fold whipped cream into mascarpone mixture.
- Spread the mascarpone cream evenly over the cooled brownies.
- Dust with cocoa powder before serving.
- Chill for at least 2 hours for best texture, then slice into squares.
Notes
- For extra tiramisu flavor, brush cooled brownies lightly with espresso before adding cream layer.
- Store in refrigerator for up to 4 days.
- Can be made a day ahead for convenience.
- Prep Time: 20 mins
- Cook Time: 30 mins
- Category: Dessert
- Method: Baking
- Cuisine: Italian-American

Ingredients
(Tip: You can find the complete list of ingredients and their measurements in the recipe card below.)
Brownie base – A rich, fudgy brownie layer forms the foundation. You can make this from scratch with butter, sugar, cocoa powder, and flour, or use a high-quality boxed brownie mix for convenience.
Espresso or strong coffee – This adds the signature tiramisu flavor. Brushing coffee over the brownies gives them depth and balances the sweetness.
Mascarpone cheese – Essential for that creamy tiramisu texture. It’s smooth, slightly tangy, and luxurious.
Heavy cream – Whipped with mascarpone to create a light, fluffy topping.
Powdered sugar – Sweetens the cream mixture without making it grainy.
Vanilla extract – Enhances the flavor of the cream layer with a subtle warmth.
Eggs – Used in the brownie layer for structure and richness.
Cocoa powder – Sprinkled on top to finish, just like a traditional tiramisu.
Dark chocolate – Optional, but folding in chocolate chunks makes the brownie base extra indulgent.
Kahlua or coffee liqueur (optional) – For an adult twist, you can add a splash to the coffee mixture before brushing it over the brownies.
Directions
Start by preheating your oven to 350°F (175°C). Prepare your brownie batter, either homemade or from a mix, and pour it into a lined baking pan. Bake according to directions until just set—be careful not to overbake, as you want a fudgy texture. Let the brownies cool completely.
Once cooled, brew a strong cup of espresso or coffee. Brush the surface of the brownies generously with the coffee, allowing it to soak in slightly but not make the brownies soggy. If using, mix a little Kahlua with the coffee before brushing for an extra layer of flavor.
Next, make the cream layer. In a mixing bowl, beat mascarpone cheese, powdered sugar, and vanilla until smooth. In a separate bowl, whip heavy cream until stiff peaks form, then gently fold it into the mascarpone mixture to create a fluffy cream.
Spread the mascarpone cream evenly over the cooled, coffee-soaked brownies. Smooth the top with a spatula. Dust generously with cocoa powder to finish. For best results, refrigerate the tiramisu brownies for at least 2 hours before slicing to let the flavors meld. Cut into squares and serve chilled.
Equipment needed
- Mixing bowls
- Electric mixer or whisk
- Baking pan (8×8 or 9×9 inches)
- Spatula
- Coffee brush or spoon
- Fine mesh sieve (for cocoa dusting)
Servings and timing
This recipe yields about 12 brownies. Preparation takes around 20 minutes, baking about 30 minutes, and chilling requires at least 2 hours. Total time: roughly 3 hours (including chilling).
Storage/reheating
Store tiramisu brownies in an airtight container in the refrigerator for up to 4 days. They should not be reheated, as the cream layer is best enjoyed chilled. These brownies also freeze well—wrap slices individually and store for up to 1 month. Thaw in the fridge overnight before serving.
Variations and Customizations
Alcohol-Free Version – Simply skip the liqueur and use plain coffee for a family-friendly version.
Chocolate Espresso Brownies – Mix a spoonful of instant espresso powder into the brownie batter for even more coffee flavor.
Layered Dessert Bars – Add a middle layer of ladyfinger crumbs soaked in coffee before spreading the mascarpone cream.
White Chocolate Twist – Swirl melted white chocolate into the mascarpone cream for a sweeter topping.
Nutty Crunch – Add chopped hazelnuts, walnuts, or almonds to the brownie batter for extra texture.
Vegan Tiramisu Brownies – Use a vegan brownie base, dairy-free whipped cream, and a cashew-based mascarpone substitute.
Extra Chocolate Layer – Drizzle melted dark chocolate over the top before chilling for a decorative finish.
Individual Cups – Instead of slicing, layer brownie cubes, cream, and cocoa powder in cups for a trifle-style presentation.
Mocha Lovers’ Bar – Blend cocoa powder into the mascarpone cream for a mocha-flavored topping.
Caramel Swirl – Drizzle salted caramel over the brownie base before adding the cream for a rich twist.
FAQs
Can I use cream cheese instead of mascarpone?
Yes, but the texture will be slightly denser and tangier than traditional tiramisu cream.
Do I need to refrigerate tiramisu brownies?
Yes, the cream layer must stay chilled for freshness and texture.
Can I make them in advance?
Absolutely—these taste even better the next day after the flavors develop.
What’s the best coffee to use?
Strongly brewed espresso or dark roast coffee works best.
Can kids eat these brownies if I add liqueur?
No—skip the liqueur for a kid-friendly version.
How do I cut clean slices?
Chill the brownies thoroughly and use a sharp knife wiped clean between cuts.
Can I use boxed brownie mix?
Yes, it’s a great shortcut and works perfectly as the base.
Do they taste more like brownies or tiramisu?
They’re a perfect hybrid—rich and chocolatey like brownies, creamy and coffee-flavored like tiramisu.
Can I freeze tiramisu brownies?
Yes, wrap slices individually and store for up to 1 month.
How long should I chill them before serving?
At least 2 hours, but overnight is ideal.
Conclusion
Easy Tiramisu Brownies combine the best of two beloved desserts into one irresistible treat. With a fudgy chocolate base, a creamy mascarpone topping, and a dusting of cocoa, they are elegant yet simple to make. Whether you’re preparing them for a dinner party or just indulging in a weekend baking project, these brownies are sure to impress. The make-ahead nature of this dessert makes it even more appealing—you’ll always have a decadent, coffee-kissed sweet ready to enjoy. Once you try them, they’ll quickly become a staple in your dessert rotation.
Hungry for more? Visit our website for full recipes and follow us on Pinterest for daily foodie inspo you’ll love to pin!