Why You’ll Love This Recipe
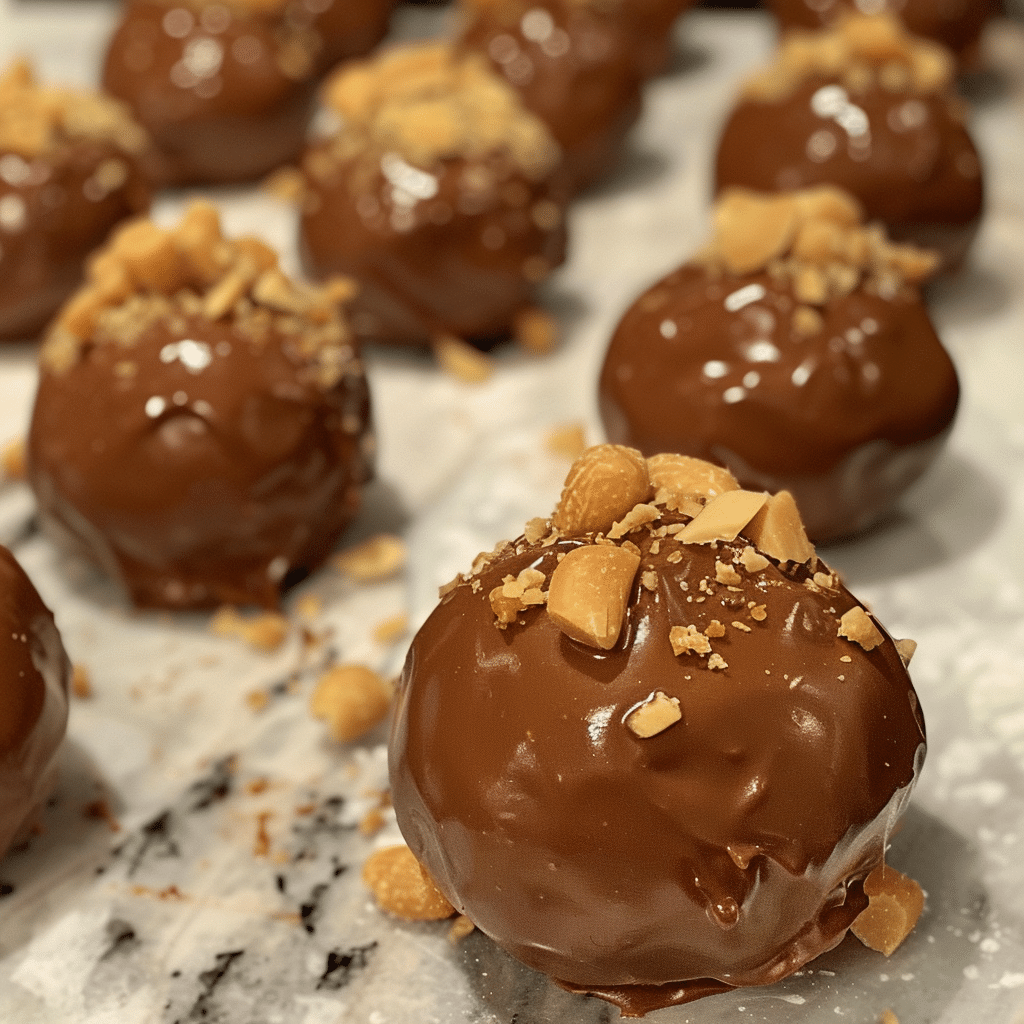
Peanut Butter Balls are one of those timeless treats that feel nostalgic, comforting, and irresistibly satisfying. With a creamy peanut butter centre and a sweet chocolate coating, they strike the perfect balance between rich and simple. Best of all, they require no baking, making them ideal for busy days, holiday trays, or quick dessert cravings. I especially love how flexible this recipe is; I once loosened the chocolate coating with a small splash of almond milk when it thickened too quickly, and it worked beautifully without affecting flavour. These bite-sized treats are easy to make ahead, travel well, and are always a hit with both children and adults. Whether you call them peanut butter balls or buckeye-style candies, they are a reliable, crowd-pleasing favourite.
Print
Peanut Butter Balls: A Classic No-Bake Treat That Never Goes Out of Style
- Total Time: 45 mins
- Yield: 24 balls
- Diet: Vegetarian
Description
Classic no-bake peanut butter balls made with creamy peanut butter and coated in chocolate—an easy, bite-sized treat perfect for holidays or snacking.
Ingredients
- 1 cup creamy peanut butter
- 1/2 cup unsalted butter, softened
- 2 cups powdered sugar
- 1 tsp vanilla extract
- 2 cups chocolate chips (milk, dark, or semi-sweet)
- 1 tbsp coconut oil or shortening (for melting chocolate)
Instructions
- In a bowl, mix peanut butter, butter, powdered sugar, and vanilla until smooth.
- Roll mixture into 1-inch balls and place on a parchment-lined tray.
- Freeze for 20–30 minutes until firm.
- Melt chocolate chips with coconut oil until smooth.
- Dip each peanut butter ball into melted chocolate, coating fully.
- Place back on parchment and let chocolate set at room temperature or refrigerate.
- Store chilled until ready to serve.
Notes
- Freeze balls briefly before dipping for cleaner coating.
- Use a fork or toothpick to dip easily.
- Sprinkle sea salt on top before chocolate sets for contrast.
- Store in the fridge up to 1 week or freeze up to 2 months.
- Prep Time: 15 mins
- Cook Time: 0 mins
- Category: Dessert
- Method: No-Bake
- Cuisine: American
Ingredients
(Tip: You can find the complete list of ingredients and their measurements in the recipe card below.)
Peanut butter
The star of the recipe. It provides a rich, nutty flavour and a creamy texture that forms the base of the filling.
Butter
Adds richness and helps bind the peanut butter mixture, giving it a smooth, melt-in-your-mouth consistency.
Powdered sugar
Sweetens the filling while also helping it firm up enough to roll into balls.
Vanilla extract
Enhances the overall flavour and adds warmth to the peanut butter mixture.
Chocolate
Used for coating the balls, chocolate adds a satisfying snap and balances the sweetness of the filling.
Milk
Used in very small amounts to thin the chocolate if needed. Almond milk works just as well.
Salt
A pinch sharpens the peanut butter flavour and prevents the sweetness from becoming overpowering.
Directions
Begin by combining peanut butter, softened butter, powdered sugar, vanilla extract, and salt in a mixing bowl. Stir until the mixture is smooth and fully combined. If the mixture feels too soft, refrigerate it for 15–20 minutes to make it easier to handle.
Once firm enough, scoop small portions of the mixture and roll them gently between your palms to form even balls. Place them on a parchment-lined baking sheet and refrigerate again for about 20 minutes so they hold their shape during dipping.
While the balls chill, melt the chocolate using a microwave or double boiler, stirring until smooth. If the chocolate is too thick, add a small splash of milk to loosen it. Dip each chilled peanut butter ball into the melted chocolate, coating it evenly. Use a fork to lift it out, allowing excess chocolate to drip off before placing it back on the tray.
Return the coated balls to the refrigerator and chill until the chocolate is fully set. Once firm, they are ready to serve.
Essential Equipment
Must-Have Tools to Get Rolling
Here’s what you’ll want to have on hand:
Silicone Spatula – Durable, heat-resistant silicone spatula perfect for mixing, scraping, and spreading. Gentle on non-stick cookware and easy to clean.
Large pot – You’ll need this to boil the whole cabbage head and soften the leaves.
large bowl –Spacious, durable large bowl ideal for mixing, serving, or food preparation. Made from sturdy material and easy to clean.
Sharp knife – For coring the cabbage and slicing out the thick stem in each leaf. A paring knife works best.
Mixing bowl – A big bowl makes it easier to combine your meat and rice filling evenly.
Cutting board – For prepping cabbage leaves and rolling them like a pro.
9×13-inch baking dish – Ideal size to fit your rolled cabbage leaves snugly and prevent them from unraveling.
knife – A sharp, durable kitchen knife perfect for slicing, chopping, and dicing with ease.
Servings and timing
Makes approximately 24 peanut butter balls.
Preparation time: 20 minutes
Chilling time: 40 minutes
Total time: about 1 hour
Storage/reheating
Store peanut butter balls in an airtight container in the refrigerator for up to one week. They also freeze exceptionally well; freeze for up to two months and thaw briefly before serving. These treats do not require reheating and are best enjoyed chilled or at cool room temperature.

Variations and Customizations
Buckeye-Style Peanut Butter Balls
Leave a small portion of peanut butter visible on top instead of fully coating with chocolate.
Crunchy Peanut Butter Version
Use crunchy peanut butter for added texture.
Dark Chocolate Coating
Swap milk chocolate for dark chocolate for a richer, less sweet finish.
White Chocolate Peanut Butter Balls
Dip in white chocolate for a sweeter, creamier variation.
Peanut Butter Pretzel Balls
Mix crushed pretzels into the filling for a sweet-salty crunch.
Chocolate Peanut Butter Drizzle
Dip halfway in chocolate and drizzle the rest over the top.
Protein-Boosted Bites
Add a small amount of vanilla protein powder to the filling.
Holiday Sprinkle Version
Top with sprinkles before the chocolate sets for festive appeal.
Almond Butter Alternative
Substitute peanut butter with almond butter for a different nutty flavour.
Coconut Peanut Butter Balls
Roll the balls in shredded coconut instead of dipping in chocolate.
FAQs
Can I use natural peanut butter?
Yes, but make sure it is well mixed. Natural peanut butter can make the filling softer.
Why is my mixture too sticky to roll?
Chill it longer or add a bit more powdered sugar.
Can I make these ahead of time?
Yes, they are perfect for making ahead and storing.
How do I keep the chocolate smooth?
Melt it slowly and stir frequently to prevent seizing.
Can I skip the butter?
Butter helps with texture, but you can reduce it slightly if needed.
Are these gluten-free?
Yes, as long as all ingredients used are gluten-free.
Can I double the recipe?
Yes, this recipe scales easily.
Do I need to temper the chocolate?
No, simple melting works well for this recipe.
Can I use almond milk to thin the chocolate?
Yes, a very small amount works well.
Should these be served cold?
They taste best slightly chilled but can be served at room temperature.
Conclusion
Peanut Butter Balls are a simple yet indulgent no-bake dessert that delivers big flavour with minimal effort. Creamy, chocolatey, and endlessly customizable, they are perfect for holidays, gifting, or everyday treats. Once you make them, you’ll understand why this classic recipe has stood the test of time and continues to be a favourite in kitchens everywhere.
Hungry for more? Visit our website for full recipes and follow us on Pinterest for daily foodie inspo you’ll love to pin!